In the last episode, we have seen the introduction of Power Pages, and why Microsoft introduced it. We have also seen different features provided by Power Pages to the different target/fusion group(s).
Now, we can see how we can get started with Power Pages, and as a low code maker or as a Citizen developer how we can set up an exciting external customer-facing website using Power Pages.
How to Start with Power Pages
If you are new to Power Platform and want to work with Power Pages, please click the below URL and then hit “Free”. Follow the onscreen instruction.
https://powerpages.microsoft.com/
You need to use your school/work account. If you are familiar with Power Platform products and have an active account, please click the below URL to access the Power Pages-related portal.
https://make.powerpages.microsoft.com/
After the above steps, you will see a screen like the below:
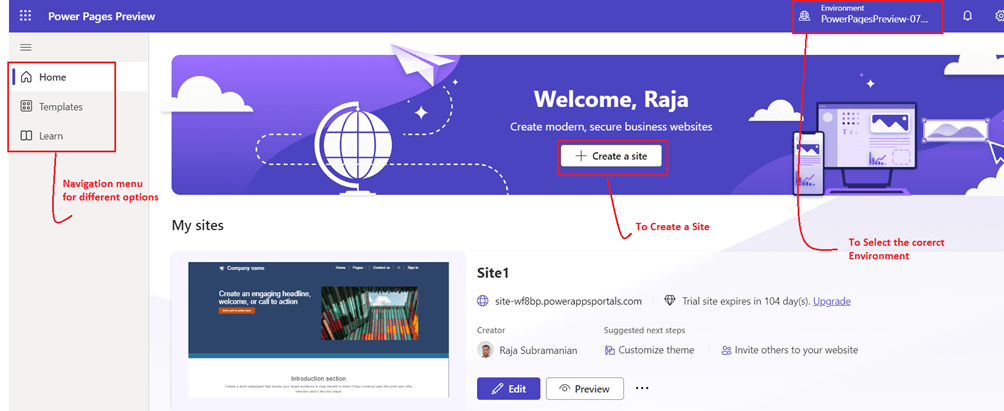
- Click “Create a site” to create a new site
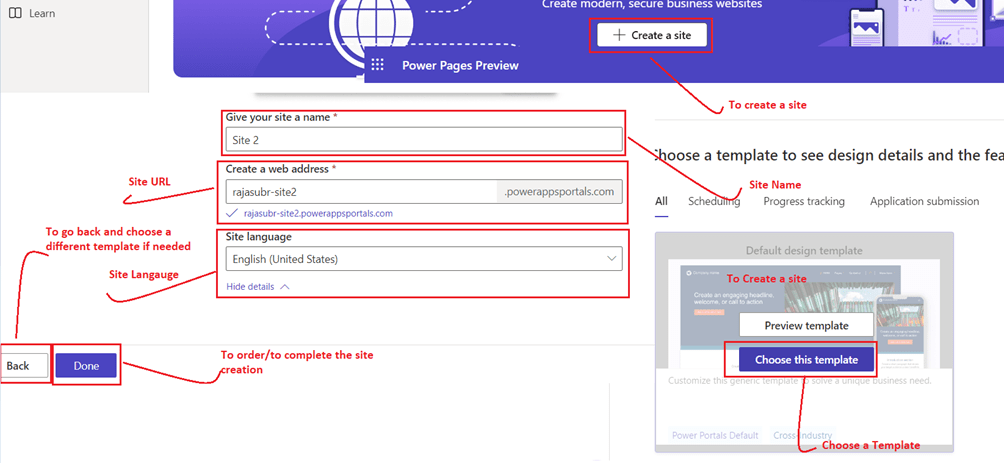
- Select a “Template” that fits your need
- Give a site name that you want
- Give a site URL which you want
- Select a “Site language” which your site needs to use
- Finally, click “Done”
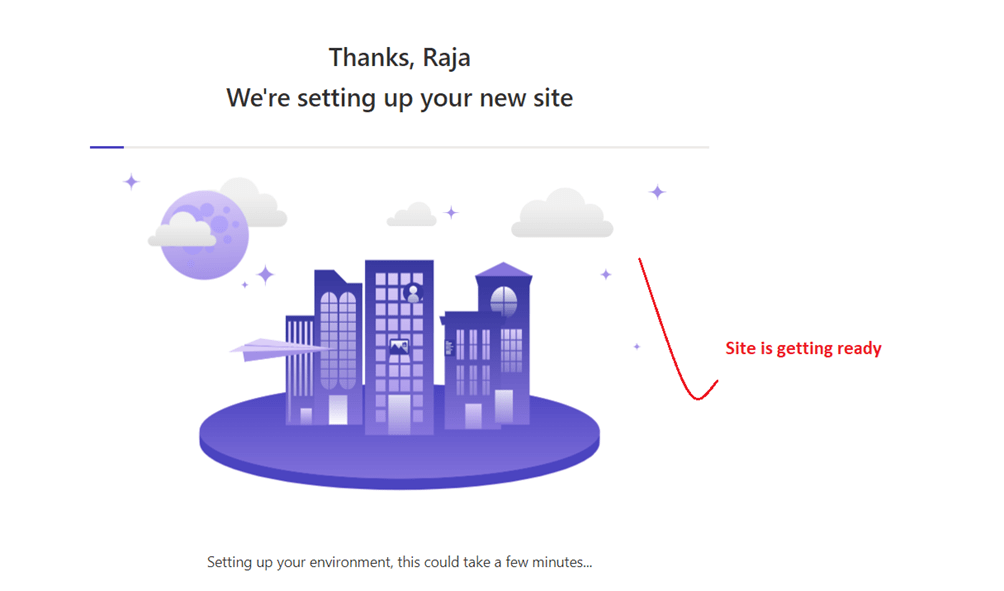
After clicking “Done”, this will take a couple of minutes to get your site ready.
Once it is ready for use, you can access the site by accessing the “Site URL” which you have given in the “Create a web address” section. in my case: https://rajasubr-site2.powerappsportals.com/
We have created the brand-new Power Pages site now. Let us go through the features list now.
Available Features for Citizen Developers
In the previous post, we learned about the different groups who can create and maintain the Power Pages and the available feature. Let us go through the available features one be one
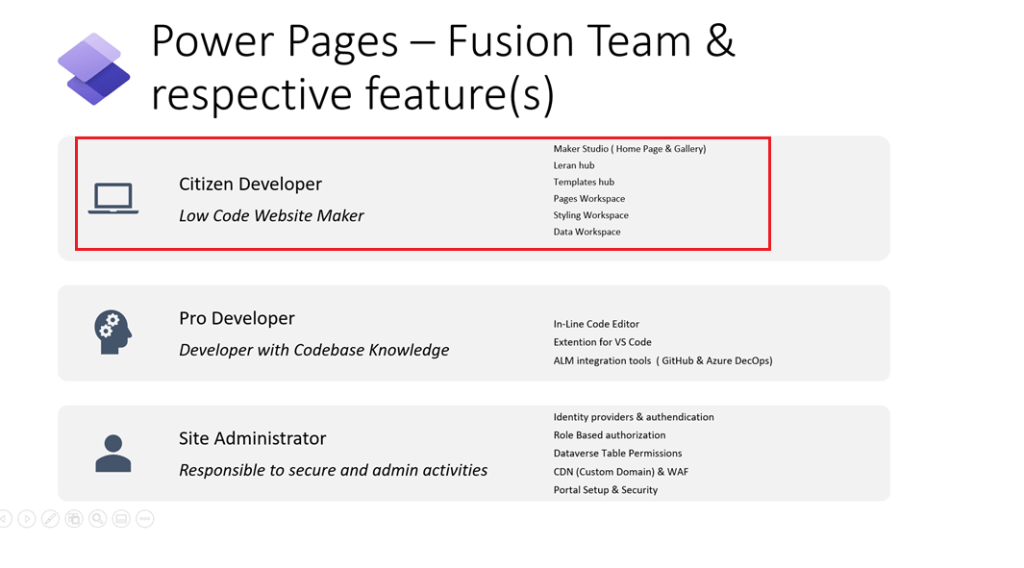
Maker Studio (Home Page & Gallery)
Maker Studio is nothing but the home page that we are landing when we are logging in to access the Power Pages.
- You can create a new site by clicking the “Create a site” button from Maker studio
- All the existing Power Pages Sites will be listed
- All the existing Power App portals will be listed
- A site can be previewed either on Desktop or Mobile by using the “Preview” button on the site
- Quick link of a Power Pages site can be copied
- Quick URL to manage the Power pages site can be seen
- Help materials for some of the admin functionalities can be accessible
- If you want to edit a Power Pages site then the “Edit” button can be used
- Delete a Power Pages site activity can be carried out

Templates Hub
Templates hub is nothing like a place where you can access all the available pre-defined / readymade templates to create a site based on your need.
Currently (as part of the preview feature version) the Templates section will have only 5 templates. out of 5, 2 templates are coming soon. However, once Power Pages are available in the General Availability (GA) this section will have a lot of ready-made templates which we can use for our needs. Templates hub is using all the capabilities like web API, code component and etc
- Hover over the template to preview and select the template
- The “Preview template” button can be used to get more information about the template and to see how the website will look like
- Search Templates can be used to Search a template by using some keyword
- Template categories can be used to find a Template that falls under s specific category
- Do you have an idea to improve the Templates Hub or do you want Microsoft to introduce a scenario-based template then follow the “Help us improve the template library” button and submit your voice.

Learn Hub
Learning Hub is the place where everyone can learn how to use Power Pages to construct an external-facing website. This will have documents, videos, guides to integrate with other Power Platform products, etc. This makes citizen developers, pro developers, and site administrators easy. otherwise, you should come out from the Maker Power Pages portal and search for the learning materials.
This can be navigated by clicking the “Learn” tab from the Power Platform maker studio

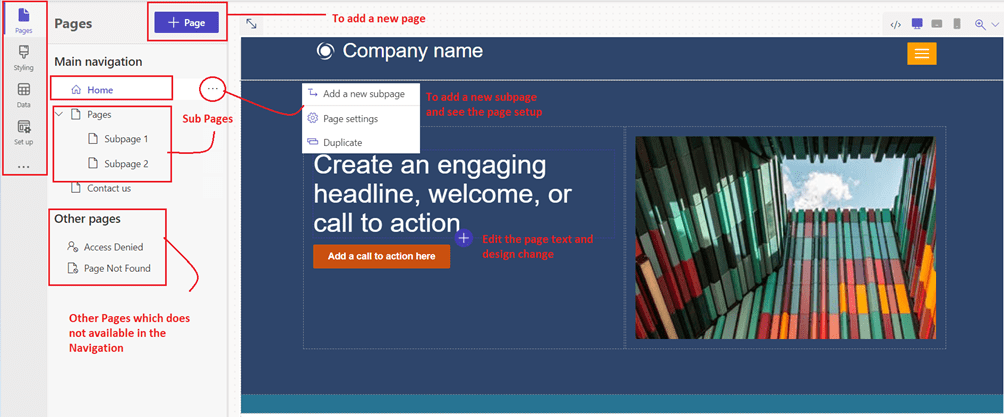
Design Studio – Pages Workspace
Design Studio is the place where you will design the page from scratch or modify the design of the default pages. You can also manage the pages from here. The beauty of design studio is it will allow you to edit/modify the default pages like access denied page, page not found and etc.
A Page in Power Pages is nothing but a web page. In simple words, this is the container of your text that you want to display to your external facing customer user.
- Click on the “Edit” button of the site which you want to edit from the Maker Studio home page
- This will navigate you to the Design Studio – Pages workspace
- To add a page using the “+Page” button
- To see the “Sub Pages”, expand the Pages section
- Access denied, Page not found can be found under the “Other pages” section
- To add a subpage, please click on the “…” against the Home menu
- To add content to the page, click on the page section where you want to edit/update the content
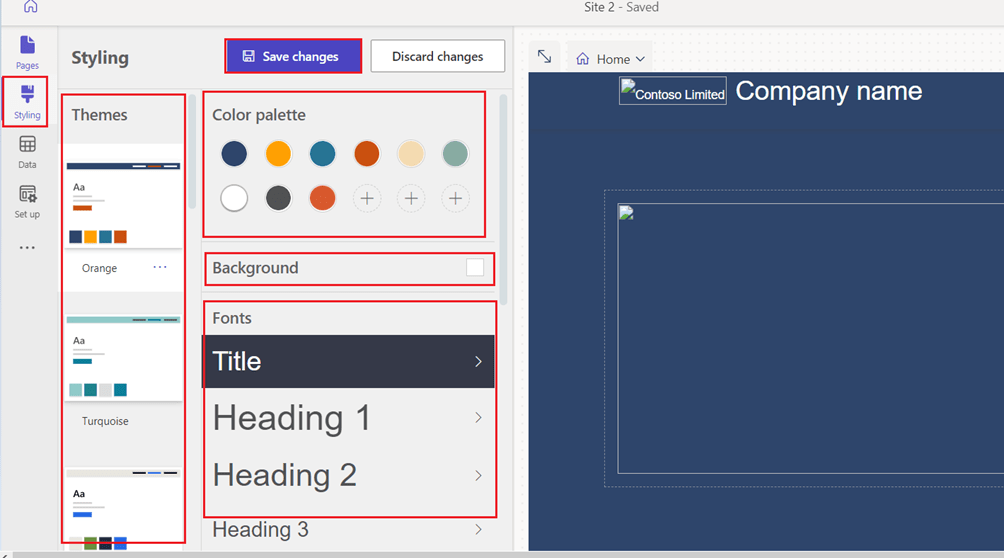
Design Studio – Styling Workspace
The styling workspace is the place where you design/customize the styling of the website. We can navigate to the styling workspace by just clicking the “Styling” from the design studio.
- Different Theme can be previewed and selected
- The background color of the site can be checked and set
- Different Header, Footer can be set/modified
- Button color can be set/modified
Data Workspace
The data workspace is the place where you can see all your existing Dataverse tables and data. You can create the new Dataverse table or add data to an existing Dataverse table. Basically, you can do all the CRUD operations here.
Click on the “Data” tab to work with Data Workspace.

Points to consider:
As you begin to plan your first Power Pages project, consider the following questions:
- Who will use my site?
- What will my users do?
- What text and content the site will have?
- What is shown publicly and what is secured?
- What will users use to sign in or register?
- How the data will be segmented after users sign in?
- How will my users find my site?
Answering these questions will help guide discussions as you embark on your project.
Interesting Factors to know
- Code Re-use in Power Pages
- Do you feel navigating the Power Pages modules is very easy and its look like other Power Platform Products like Power Apps and Power Automate? This is because the Power Pages use the same code base of Power Apps. This is one of the ways Microsoft is teaching how as a pro developers we need to think and re-use the code
- It is not recommended to create a site in the default environment as it is shared across all the users in the tenant, and has a risk of sharing data with unintentional users
For more detailed information
Please refer to the below Microsoft articles.
- Sign up instructions to start using Power Pages – https://docs.microsoft.com/en-us/power-pages/getting-started/trial-signup
- How to create a Power Pages site – https://docs.microsoft.com/en-us/power-pages/getting-started/create-manage
- How to use Templates Hub – https://docs.microsoft.com/en-us/power-pages/templates/
- How to use Lean Hub – https://docs.microsoft.com/en-us/power-pages/getting-started/use-learnhub
What will be the next episode
In the next episode let us see how a PRO Developer can work and enhance the Power Pages-based external facing site.
Happy learning!!!

Leave a comment