In this blog post let us go through the list of features available for Site Administrators and how a Site Administrator can use different tools and methods to maintain and secure the Power Pages.
As we have seen earlier, Power Pages are built on the foundation of Power Apps portals. Many of the tools and methods used to configure Power Pages use the functionality of Power Apps portals.
Set up
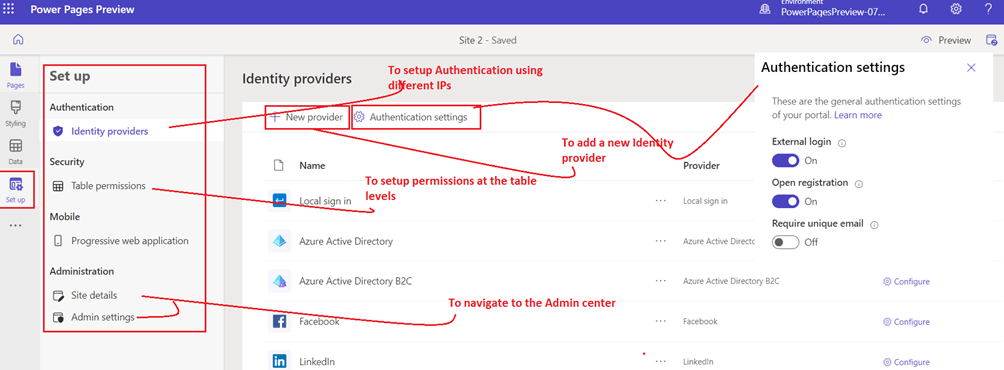
Many Administrators features can be accessed from the “Set up” tab in the Design Studio
Authentication
Authentication can be set by using different authentication providers. By default, Local sign-in and Azure active directory sign-in are enabled. Other sign-in methods can be enabled. Let us discuss this feature in deep later as a separate blog post
- The “New Provider” button can be used to add & setup a new Identity Provider
- “Authentication setup” can be used to set up different authentication setups
- External login: External authentication is provided by the ASP.NET Identity API. Account credentials and password management are handled by third-party identity providers, for example, Facebook, LinkedIn, Google, Twitter, and Microsoft.
- When set to On, users sign up for access to the portal by selecting an external identity to register with the portal. After it’s registered, an external identity has access to the same features as a local account. See Manage external accounts for related site settings.
- When set to Off, external account registration and sign-in are disabled and hidden.
- Open registration: Enables or disables the sign-up registration form for creating new local users.
- When set to On, the sign-up form allows any anonymous user to visit the portal and create a new user account.
- When set to Off, new user account registration is disabled and hidden.
- Require unique email: Specifies whether a unique email address is needed for validating a new user during sign-up.
- When set to On, a sign-up attempt might fail if a user provides an email address that’s already present in a contact record.
- When set to Off, a contact that uses a duplicate email address can be created

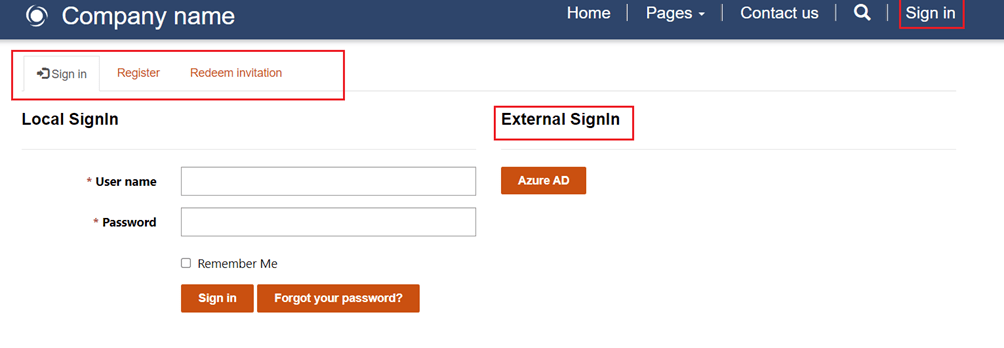
Table Permission
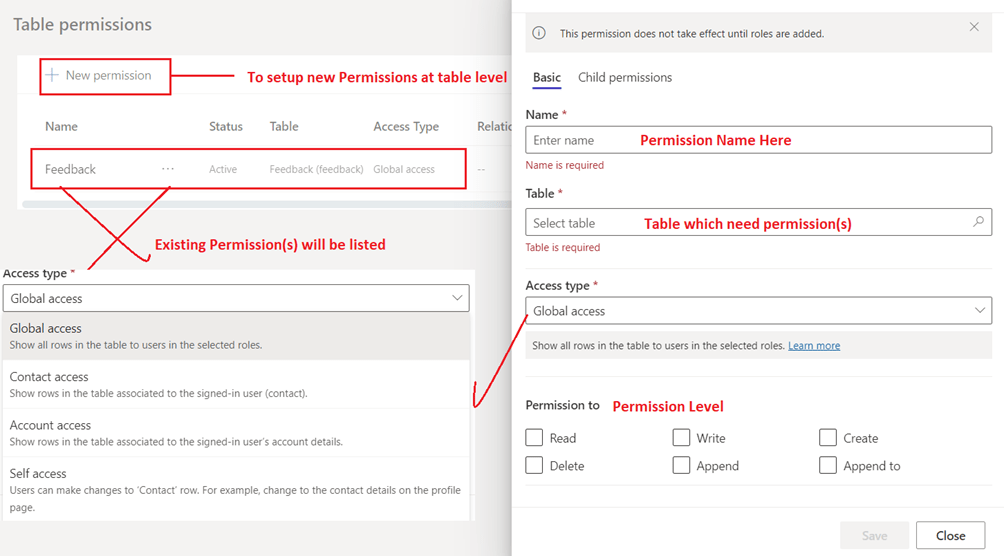
Permissions for the user can be set at the table level by using the “table permissions” tab.
The “New permission” button should be used to create new permissions. This will ask for the table, permission level, and access type
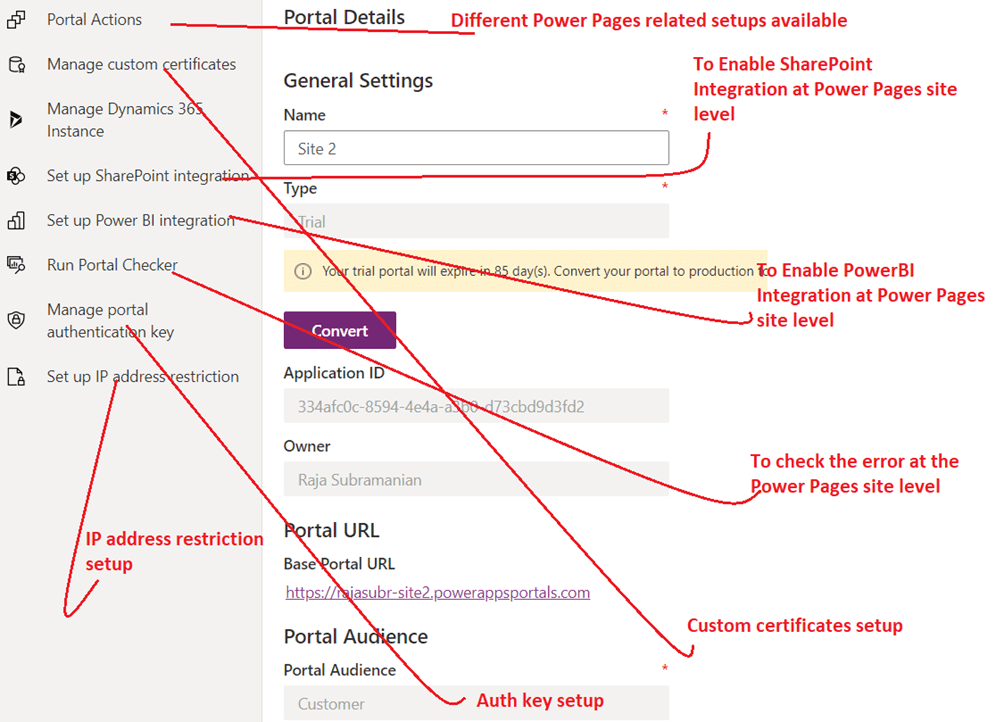
Power App portal admin center
Site details and Admin settings can be used to set up & configure Power Pages-related configuration. Power Pages uses Power Apps portals admin center to provide administrators with many capabilities.
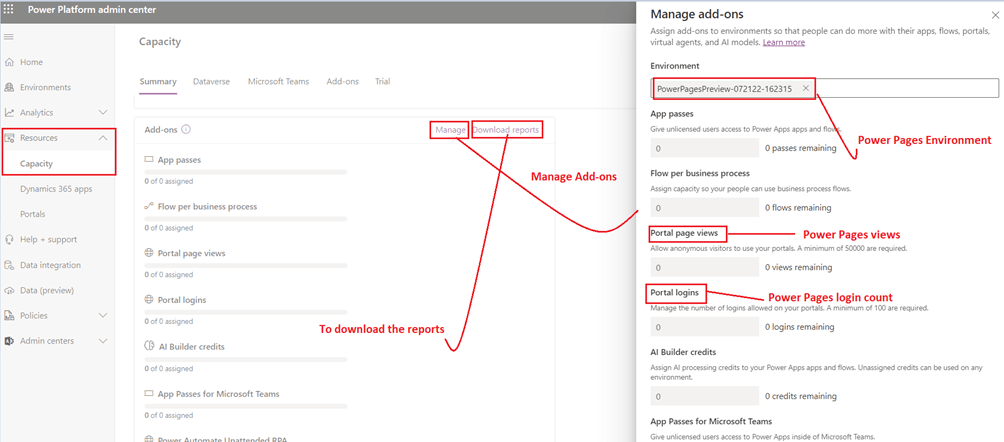
Capacity consumption reports
Capacity consumption reports show the number of sign-ins (“logins”) and page views for Power Pages
To see the report or set up the report follow the below steps:
- Go to the power platform admin center: Power Platform Admin Center
- Click on the “resources” tab and then the “capacity” tab
- Click on “Add-ons”
- Download the report and see OR
- Click on “Manage” select the Power Pages site and hit “Save”
Update Solution
The site administrators should update the solutions to make the new solutions available for use When we add a Power Pages site to an environment, many solutions are installed. Periodically, new solutions updates are made available. Updating solutions for Power Pages follows the same process as updating solutions for Power Apps portals
- Go to the power platform admin center: Power Platform Admin Center
- Click on the “resources” tab and then the “portals” tab
- Select the Power Pages site which you want to check and update the solution
- Click on the “Check portal package(s) for upgrade”
- Click OK if the upgrade is available

Error Logs
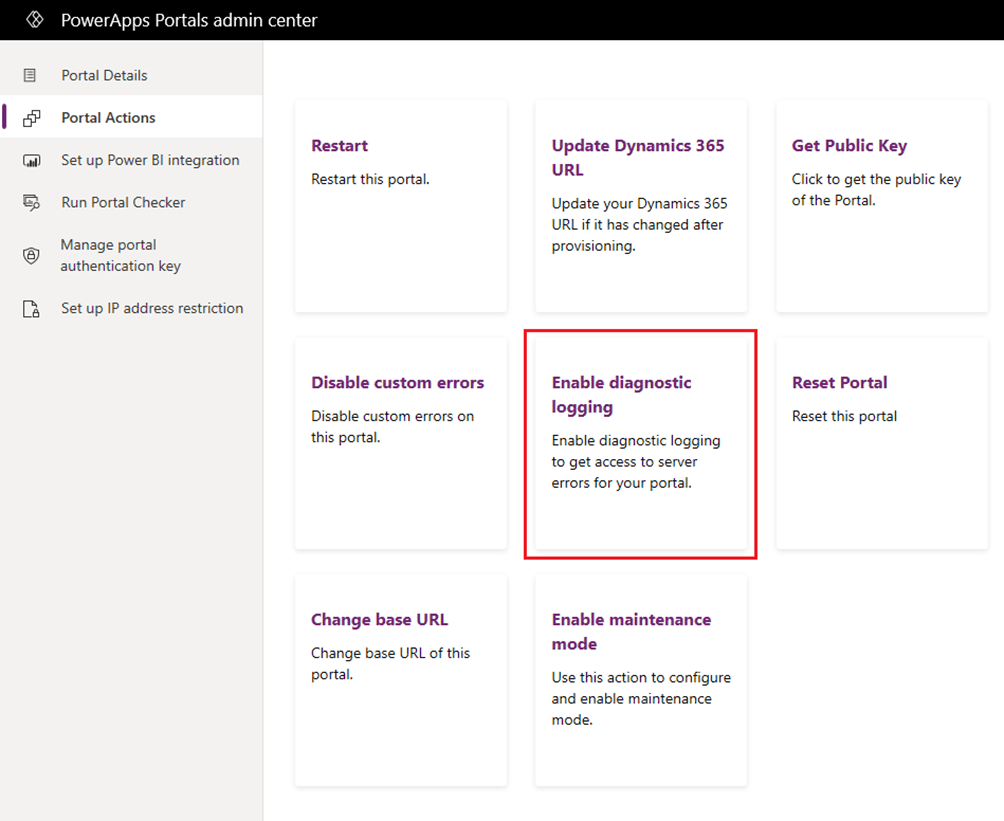
Error logs can be seen by the administrator by following the below steps. This will be used to debug and fix the Power Pages related issues
- Go to Power Apps portals admin center
- Click on “Portal Actions”
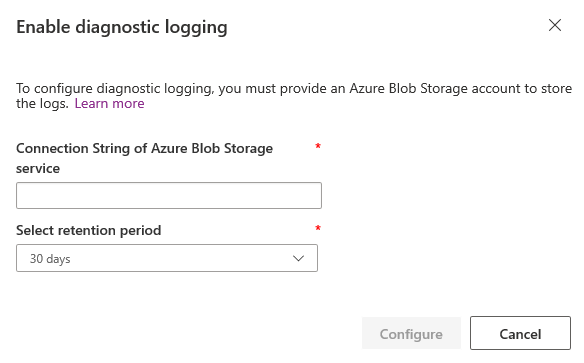
- Click on the “Enable diagnostic logging” option
- Connection String of Azure Blob Storage service: URL of the Azure Blob Storage service to store the portal error logs. The maximum length of the URL is 2048 characters. If the URL is longer than 2048 characters, an error message appears. More information on connection strings: Configure Azure Storage connection strings
- Select retention period: Duration to keep the portal error logs in blob storage. The error logs are deleted after the selected duration. You can select one of the following values:
- One day
- Seven days
- 30 days
- 60 days
- 90 days
- 180 days
- Always
- Select Configure
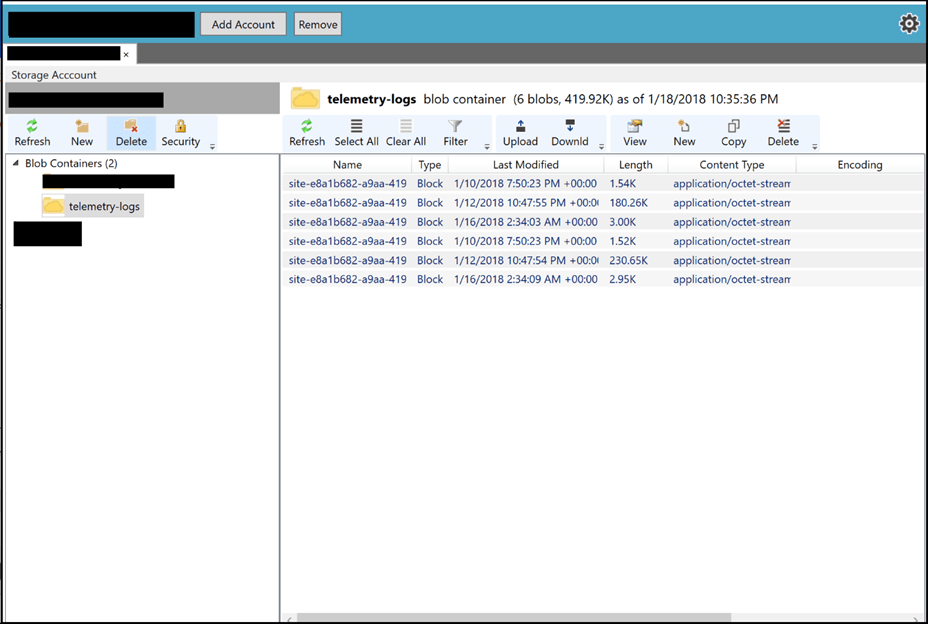
Once diagnostic logging is configured, a new telemetry-logs blob container is created in the Azure storage account and the logs are written into the blob files stored in the container. The following screenshot shows the telemetry-logs blob container in Azure Storage Explorer
Supporting Microsoft Materials
- How to setup capacity consumptions report: https://docs.microsoft.com/en-us/power-apps/maker/portals/admin/portal-consumption-reports
- How to upgrade Solutions: https://docs.microsoft.com/en-us/power-apps/maker/portals/admin/update-portal-solution
- How to configure error logs: https://docs.microsoft.com/en-us/power-apps/maker/portals/admin/view-portal-error-log
Conclusion
There are still many setups & configurations that can be managed by site admins. We have seen just a few. Let us learn about other important site administrators activities in other dedicated blog posts.
In the next episode let us see how we can add different types of components to a Power Page to enhance the Power Pages-based external facing site.
Happy learning !!!

Leave a comment